How Do You Remove Smells from Food Storage Containers?
Last Updated on September 14, 2026
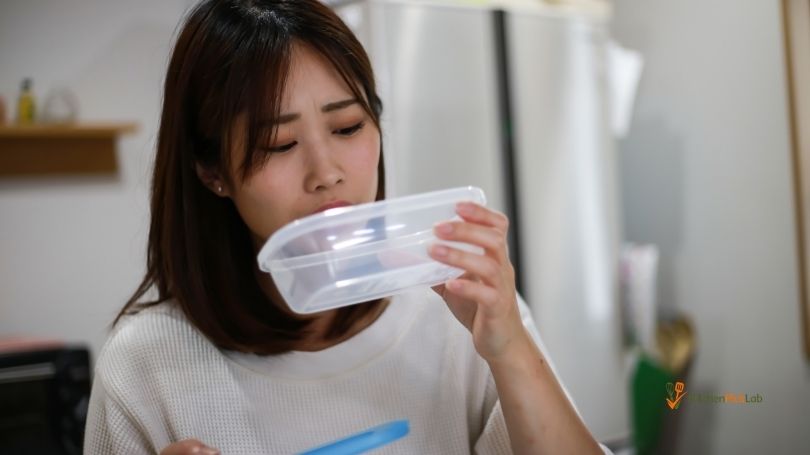
Have you ever opened a food storage container, only to be hit with a strong, unpleasant smell that just won’t go away? It’s frustrating, isn’t it?
Those stubborn odors can make your fresh food less appealing and even affect the taste. But don’t worry—you don’t have to live with those smells. You’ll discover simple, effective ways to remove odors from your food storage containers. By the end, you’ll know exactly how to keep your containers fresh and ready for your next meal.
Keep reading—you’re just a few steps away from saying goodbye to those unwanted smells for good!
Common Causes Of Odors
Read More – 8 Kitchen Cleaning Tools Every Home Should Have
Food storage containers often keep unwanted smells after use. These odors come from different causes. Understanding these causes helps remove smells effectively. Some foods release strong smells that stick to containers. The material of the container also affects how much odor stays inside.
Types Of Smelly Foods
Certain foods cause stronger odors in containers. Garlic and onions have sharp, lasting smells. Spicy foods leave behind a warm scent. Fish and seafood create strong, pungent odors. Dairy products may leave sour smells. These foods have oils and particles that cling to surfaces.
Material Impact On Odor Retention
Container materials affect odor retention greatly. Plastic containers often hold onto smells more than glass. Porous materials absorb oils and scents easily. Glass and stainless steel resist odors better. Silicone can trap smells if not cleaned well. Choosing the right container helps reduce lingering odors.
Immediate Cleaning Tips
Removing smells from food storage containers starts with quick action. Immediate cleaning stops odors from sticking inside the container. The faster you clean, the better the results.
Use simple methods to rinse and wash containers right after use. This prevents smells from becoming hard to remove later.
Rinsing Techniques
Rinse containers with warm water right after emptying food. This removes leftover bits that cause bad smells. Use running water to flush out all food particles. Avoid letting containers sit with food residue inside. Quick rinsing helps stop odors from forming.
Using Hot Soapy Water
Wash containers with hot water and dish soap. Hot water breaks down oils and food stains that hold smells. Use a soft sponge to scrub all surfaces, including lids and corners. Make sure to clean seals and grooves well. Rinse thoroughly to remove soap and smell traces.
Natural Deodorizing Methods
Read More – Top 5 Daily Kitchen Cleaning Habits for a Cleaner Space
Natural deodorizing methods remove smells from food storage containers safely. These methods use simple ingredients found in most kitchens. They work well without harsh chemicals. They are good for the environment and your health. Try these easy ways to freshen your containers.
Baking Soda Solutions
Baking soda is a natural odor absorber. Sprinkle it inside the container. Let it sit for a few hours or overnight. Then, rinse the container with warm water. For strong smells, make a paste of baking soda and water. Scrub the container gently with the paste. Rinse well and dry. Baking soda leaves containers smelling clean and fresh.
Vinegar Soaks
White vinegar helps break down stubborn odors. Fill the container with equal parts vinegar and water. Let it soak for 30 minutes to an hour. Pour out the solution and rinse the container. Vinegar removes smells from plastic and glass containers. The vinegar smell disappears quickly after rinsing. Use vinegar for tough, lingering odors.
Lemon And Citrus Tricks
Lemon juice and citrus peels add a fresh scent. Rub lemon juice inside the container or squeeze it over the surface. Leave the juice for 10 to 15 minutes. Rinse the container well with water. Placing citrus peels inside the container can also help. Close the lid and let it sit overnight. Citrus tricks brighten and deodorize containers naturally.
Specialized Cleaning Agents
Specialized cleaning agents help remove stubborn smells from food storage containers. These products target odors that regular soap cannot. They work by breaking down odor molecules or absorbing them. Using the right agent can make your containers smell fresh again.
Commercial Odor Removers
Commercial odor removers are made specifically for tough smells. They come in sprays, gels, or powders. These products often use enzymes to break down odor-causing substances. Many are safe for food containers and easy to use. Apply as directed, then rinse well before use.
Activated Charcoal Use
Activated charcoal is a natural odor absorber. It traps smell particles inside its tiny pores. Place a small bag or piece in your container and close it. Leave it for a day or two. The charcoal pulls out the bad smells without chemicals.
Preventing Future Odors
Preventing odors in food storage containers saves time and keeps your kitchen fresh. It starts with good habits. Small steps can stop smells from building up.
Proper Storage Practices
Clean containers immediately after use. Dry them fully before closing lids. Store food in airtight containers to limit air contact. Avoid storing strong-smelling foods in containers used for other items. Keep containers in a cool, dry place. Rotate stored food to use older items first. These habits reduce odor buildup and keep containers fresh.
Choosing The Right Containers
Pick containers made from odor-resistant materials like glass or stainless steel. Avoid plastic containers that absorb smells. Use containers with tight-fitting lids to prevent air from entering. Consider containers with silicone seals for extra protection. Label containers to avoid confusion and unnecessary opening. Right containers help stop odors and keep food fresh longer.
Drying And Airing Out
Drying and airing out food storage containers is a simple way to remove bad smells. It helps fresh air replace trapped odors inside the containers. Proper drying also stops moisture, which can cause smells to worsen or mold to grow.
Letting containers breathe after washing is important. This process gives time for any leftover smells to fade naturally. Using natural methods like sunlight and fresh air works well without harsh chemicals. Here are two easy ways to dry and air out your containers.
Sunlight Exposure
Sunlight kills bacteria and freshens smells. Place clean containers outside on a dry day. Make sure they face the sun directly.
Leave lids off to let air flow freely inside. The sunlight’s heat helps dry the containers quickly. It also breaks down odor-causing particles.
Keep containers in the sun for a few hours. Avoid leaving plastic containers too long to prevent warping. This method works best for glass or sturdy plastic containers.
Using Fans And Ventilation
Fans speed up the drying and airing process. Set containers near a fan in a well-ventilated room. The moving air helps remove trapped odors faster.
Open windows to improve airflow. Fresh air pushes out smells and reduces moisture inside containers. Use a clean, dry rack to hold containers upright for better air circulation.
This method is useful when sunlight is unavailable or if you live in a humid area. It keeps containers fresh and ready for the next use.
When To Replace Containers
Knowing when to replace food storage containers saves time and keeps your kitchen fresh. Over time, containers can hold onto smells that no cleaner removes. Keeping old containers may cause unwanted odors to transfer to your food. Replace containers that no longer serve their purpose well.
Signs Of Permanent Odors
Some smells stick around even after washing. A strong, sour, or chemical odor that stays is a clear sign. If you smell it every time you open the container, it is permanent. No amount of soaking or scrubbing will fix this. These odors come from deep inside the container walls. It means the container has absorbed the smell and will pass it on to new food.
Material Wear And Tear
Cracks, scratches, or cloudiness show the container is aging. Damaged surfaces trap smells and bacteria. Plastic containers often stain or warp after long use. Silicone or rubber seals may break down and lose their tight fit. Old containers lose their ability to keep food fresh. This wear and tear means it is time to replace them.
Read More – 7 Common Kitchen Items You Should Clean More Often
Frequently Asked Questions
How Can Baking Soda Remove Odors From Containers?
Baking soda neutralizes acids and bases causing bad smells. Sprinkle some inside the container and let it sit overnight. Rinse well with warm water the next day for fresh, odor-free containers.
What Household Items Remove Food Smells Effectively?
Lemon juice, vinegar, and baking soda are top odor removers. Use lemon juice to scrub, vinegar to soak, or baking soda to absorb smells. These natural solutions are safe and work well on most food containers.
How Long Should Containers Soak To Lose Smells?
Soaking containers for 30 minutes to an hour often works. Use a vinegar-water or baking soda solution for best results. Longer soaking may be necessary for strong, persistent odors.
Can Sunlight Help Remove Food Container Odors?
Yes, sunlight helps kill bacteria causing odors and naturally deodorizes containers. Leave containers open under direct sunlight for a few hours. This method is eco-friendly and enhances freshness without chemicals.
Conclusion
Removing smells from food storage containers is easy with simple steps. Clean containers quickly after use to stop odors. Use baking soda, vinegar, or lemon to freshen them naturally. Let containers dry completely before storing to avoid bad smells. Regular care keeps containers smelling clean and ready for food.
Try these tips to enjoy fresh-smelling containers every time. No more worries about leftover odors or unpleasant smells. Keep your kitchen fresh and your food safe. Simple habits make a big difference.